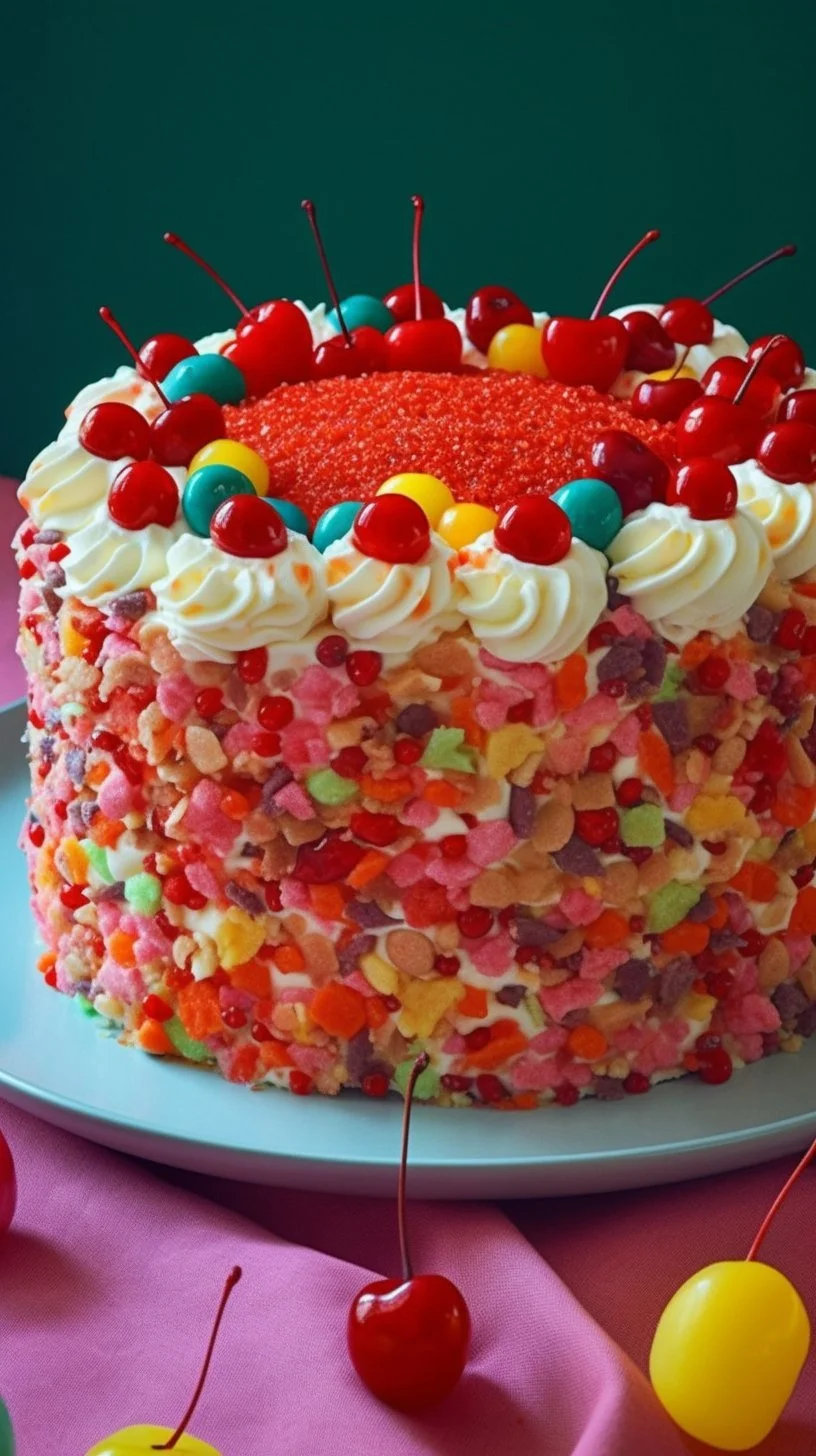
A bowl of pastels, sweet steam of vanilla, and the delicate crunch of cereal folded into clouds — this cheesecake tastes like a summer afternoon pressed into a springform pan. The crust shimmers with sugar and butter; the filling melts like memory on the tongue. If you love small-format, playful desserts, consider how these techniques echo in no-bake mini cheesecakes.
Why make this recipe
This No-Bake Fruity Pebbles Cheesecake is an ode to texture and color: a crisp, marshmallow-kissed crust that gives way to a pillowy, sweet filling. It requires no oven heat, no tempering, and very little time — only patience as the flavors settle and the cheesecake firms. If you appreciate the art of restraint in chilled desserts, the careful folding and chilling echo lessons found in luxurious no-bake cheesecakes, where texture is everything.
How to make No-Bake Fruity Pebbles Cheesecake
Ingredients:
- 6 cups Fruity Pebbles cereal
- 1/4 cup (4 tablespoons) unsalted butter
- 1 (10 oz) bag miniature marshmallows
- 1 (8 oz) package cream cheese, softened
- 1/2 cup granulated white sugar
- 2 teaspoons vanilla extract
- 1 (7 oz) jar marshmallow creme or fluff
- 1 (8 oz) tub Cool Whip or whipped topping, thawed
- 1/2 of a (21 oz) can of cherry pie filling (optional but recommended)
Directions:
- Grease a 9 inch round springform pan with cooking spray on the bottom and sides. Set aside.
- In a large microwaveable bowl, add the butter and miniature marshmallows, and microwave on HIGH for about 30 seconds. Stir, then continue microwaving in 30 second intervals, stirring after each interval, until melted and smooth.
- Add in the Fruity Pebbles and stir quickly to combine.
- Pour the mixture into the prepared pan and press into a crust using a greased bottom of a glass. Let set for about 20 minutes.
- For the cheesecake, cream together the cream cheese, sugar, and vanilla in a stand mixer until fluffy and smooth, about 1 minute.
- Beat in the marshmallow creme until well combined.
- Fold in the whipped topping, ensuring to scrape the bottom and sides of the bowl.
- Spread the cheesecake mixture into the crust and smooth out the top.
- Cover and refrigerate for at least 4 to 6 hours, preferably overnight.
- Garnish with cherry pie filling before serving.
How to serve No-Bake Fruity Pebbles Cheesecake
Slice with a sharp, warmed knife to reveal the vivid cross-section of crust and cloud-like filling. Serve chilled, on a simple white plate that lets the colors sing; a small spoonful of cherry pie filling on each slice adds a bright, tart counterpoint. For gatherings, offer coffee or a subtly herbal tea to cleanse the palate between bites.
How to store No-Bake Fruity Pebbles Cheesecake
Keep the cheesecake refrigerated, covered gently with plastic wrap or in an airtight container, for up to 3–4 days. The crust is best on the first two days while it retains a bit of snap; after that the marshmallow binder softens into a tender chew. For longer storage, cut into portions and freeze wrapped tightly for up to one month; thaw overnight in the refrigerator before serving.
Tips to make No-Bake Fruity Pebbles Cheesecake
- Soften cream cheese to room temperature for the silkiest filling; cold lumps will resist smoothing.
- Press the crust firmly but not so hard that it becomes too dense — a light, even tamp preserves a pleasing contrast of texture.
- Use a greased glass or measuring cup to press the crust cleanly and avoid streaks.
- If you want portable bites, adapt the mixture into molds or lollipop sticks to create frozen treats inspired by no-bake cheesecake pops.
- Chill overnight whenever possible; flavors deepen and the texture becomes more cohesive.
Variations (if any)
- Swap cherry filling for diced strawberries or a bright lemon curd to freshen the profile.
- For a cocoa twist, substitute 1 cup of Fruity Pebbles with chocolate cereal and add 1–2 tablespoons of cocoa to the filling.
- Add a thin drizzle of white chocolate ganache for an elegant sheen and extra sweetness.
FAQs
Q: Can I replace Cool Whip with homemade whipped cream?
A: Yes. Use stabilized whipped cream (whip heavy cream with a bit of powdered sugar and a touch of gelatin if desired) to maintain structure; plain whipped cream may weep more quickly.
Q: Will the Fruity Pebbles crust stay crunchy?
A: The crust will be crisp the first day but will soften as it absorbs moisture from the filling. Pressing the crust firmly and serving within the first 48 hours preserves the best contrast.
Q: Can I make this nut-free and allergy-friendly?
A: The recipe as written is nut-free, but always check labels on store-bought items like marshmallow crème, pie filling, and whipped topping for cross-contamination warnings.
Q: Is there a dairy-free version?
A: For dairy-free, use vegan cream cheese and a dairy-free whipped topping; texture and flavor will be slightly different but still delicious.
Q: How do I prevent the filling from being too sweet?
A: Balance sweetness by using a tart fruit garnish (like cherry or mixed berries) and avoid adding extra sugar beyond the recipe unless you prefer a sweeter finish.
Conclusion
For a faithful home adaptation and step-by-step photos, see the classic Fruity Pebbles cheesecake inspiration at Kitchen Fun With My 3 Sons’ Fruity Pebbles Cheesecake (No-Bake), and for another approachable, tried-and-true version, consult the recipe at Beyond Frosting’s Easy No-Bake Fruity Pebbles Cheesecake.
There is a quiet joy in waiting: the hours the cheesecake cools are part of the recipe’s alchemy — a patient pause that turns simple ingredients into something that tastes like memory.

No-Bake Fruity Pebbles Cheesecake
Ingredients
Method
- Grease a 9 inch round springform pan with cooking spray on the bottom and sides. Set aside.
- In a large microwaveable bowl, add the butter and miniature marshmallows, microwave on HIGH for about 30 seconds. Stir, then continue microwaving in 30 second intervals, stirring after each interval, until melted and smooth.
- Add in the Fruity Pebbles and stir quickly to combine.
- Pour the mixture into the prepared pan and press into a crust using the greased bottom of a glass. Let set for about 20 minutes.
- Cream together the cream cheese, sugar, and vanilla in a stand mixer until fluffy and smooth, about 1 minute.
- Beat in the marshmallow creme until well combined.
- Fold in the whipped topping, scraping the bottom and sides of the bowl.
- Spread the cheesecake mixture into the crust and smooth out the top.
- Cover and refrigerate for at least 4 to 6 hours, preferably overnight.
- Garnish with cherry pie filling before serving.