Why Make This Recipe
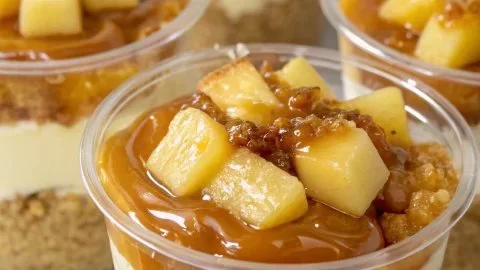
Caramel Apple Dessert Cups are a delightful treat that combines the sweetness of caramel with the natural flavors of apples. This dessert is perfect for any occasion, whether it’s a family gathering, a dinner party, or just a cozy night in. The layers of caramelized apples and airy whipped cream create a delicious harmony in every bite. Plus, it’s easy to make and can be prepared in advance, making it a great choice for busy cooks.
How to Make Caramel Apple Dessert Cups
Ingredients:
- 3 cups peeled and chopped apples
- 1/2 cup brown sugar
- 1/2 teaspoon ground cinnamon
- 1 tablespoon butter
- 4 cups whipped cream
- 1/2 cup caramel sauce
Directions:
- In a skillet, melt the butter over medium heat.
- Add the chopped apples, brown sugar, and cinnamon.
- Cook, stirring occasionally, until the apples are tender and caramelized, about 8-10 minutes.
- Remove from heat and let cool slightly.
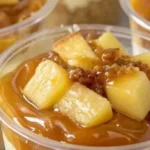
- Layer the caramelized apples and whipped cream in dessert cups.
- Drizzle caramel sauce over the top.
- Refrigerate for at least 30 minutes before serving.
How to Serve Caramel Apple Dessert Cups
To serve, take the dessert cups out of the refrigerator. You can add extra caramel sauce or a sprinkle of cinnamon on top for a nice finishing touch. This dessert is best enjoyed chilled, as the whipped cream remains light and fluffy, perfectly complementing the warm flavors of the caramelized apples.
How to Store Caramel Apple Dessert Cups
If you have leftovers, store the dessert cups in the refrigerator. They can last for up to 2 days. Make sure to cover them tightly to keep the whipped cream fresh and prevent it from absorbing other odors in the fridge.
Tips to Make Caramel Apple Dessert Cups
- Choose firm apples like Granny Smith or Honeycrisp for the best texture.
- Don’t skip the chilling step; it helps set the layers and enhance flavors.
- For added crunch, you can sprinkle some crushed nuts or granola on top before serving.
Variation
You can easily switch up the flavor by adding different spices like nutmeg, or even mixing in some chopped caramel candies for extra sweetness. If you want a richer taste, consider using dark brown sugar instead of light brown sugar.
FAQs
Q: Can I make this dessert ahead of time?
A: Yes! You can prepare the caramelized apples a day in advance and layer them with whipped cream just before serving.
Q: What type of apples work best for this recipe?
A: Firm apples like Granny Smith, Honeycrisp, or Fuji are great choices as they hold their shape when cooked.
Q: Can I use store-bought whipped cream?
A: Absolutely! Store-bought whipped cream is a quick and easy option if you prefer not to make your own.
Caramel Apple Dessert Cups
Ingredients
Method
- In a skillet, melt the butter over medium heat.
- Add the chopped apples, brown sugar, and cinnamon.
- Cook, stirring occasionally, until the apples are tender and caramelized, about 8-10 minutes.
- Remove from heat and let cool slightly.
- Layer the caramelized apples and whipped cream in dessert cups.
- Drizzle caramel sauce over the top.
- Refrigerate for at least 30 minutes before serving.