
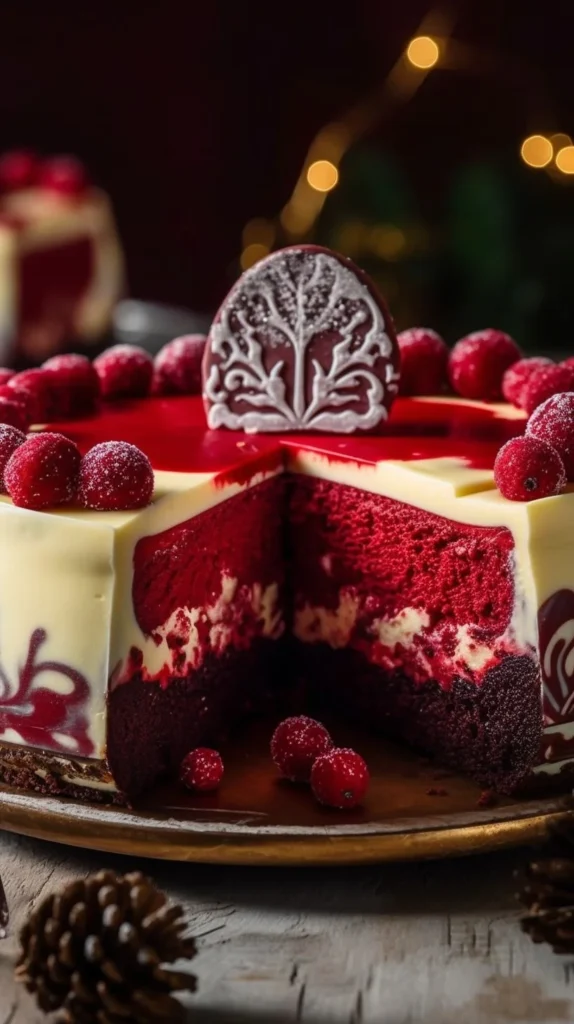
Traveling through the vibrant bazaars of holiday markets, with the scent of spices mingling in the air, brings a whirl of flavors direct to your kitchen. This Christmas Red Velvet Cheesecake brings that festive excitement into a slice, seducing your taste buds with swirls of cream and a whisper of cocoa. Let’s embark on this delicious journey, shall we?
Why make this recipe
Why settle for the ordinary when you can have a dessert that’s as rich in flavor as it is in festive spirit? This recipe marries the lusciousness of cheesecakes with the holiday charm of red velvet, all crowned with sprinkles that’ll make your heart skip a beat. Sure, there are millions of desserts out there, but how many can truly make you feel like you’re transported to a winter wonderland with each delectable bite? Join me as we dive headfirst into this irresistible creation that’ll leave everyone around the table craving more!
How to make Christmas Red Velvet Cheesecake
Let’s get messy! Toss on your apron and channel your inner baking diva as we whip up this festive delight!
Ingredients:
- 24 Oreo cookies (substitute with gluten-free Oreos for a gluten-free version)
- 1/2 cup Butter (use vegan butter for a dairy-free option)
- 16 oz Cream cheese (ensure it’s softened for easy mixing)
- 1 cup White sugar (can be replaced with sugar substitute)
- 1 cup Heavy whipping cream (coconut cream can be a dairy-free alternative)
- 1 tbsp Vanilla extract (pure extract is preferred)
- 1/4 cup Cocoa powder (ensure it’s unsweetened for best results)
- 1 tbsp Red food coloring (use gel food coloring for a more intense color)
- 1 cup Christmas sprinkles (substitute with edible glitter for added visual appeal)
- 1 cup Whipped cream (can be substituted with a plant-based cream)
- 12 pieces Mini Oreos (optional garnish)
Directions:
- Start by crushing those Oreo cookies into a delicious dust. You can unleash your inner warrior with a rolling pin or even mix it up and toss them in a blender—whatever floats your boat!
- Melt your butter and combine it with the crushed cookies. This will be the cozy crust cradling our cheesecake like a warm hug—sweet and indulgent! Press this mixture firmly into the bottom of a springform pan and pop it into the fridge to chill.
- In a mixing bowl, whip together the softened cream cheese and sugar until it’s fluffy and just begging to be tasted. Add in the heavy cream, vanilla extract, cocoa powder, red food coloring, and mix until it’s all smooth sailing.
- Pour this luscious mixture onto your chilled crust, making sure to spread it evenly and generously as you create a layer of pure bliss.
- Let that beauty chill for at least four hours—trust the process; it’s worth the wait!
- Just before the big reveal, whip up some cream and layer it on top, finishing it off with a sprinkle of Christmas magic. Use your adorably tiny mini Oreos as the cherry on top!
How to serve Christmas Red Velvet Cheesecake
Slice it up and serve it at the table like a holiday treasure! Trust me, when you bring out this showstopper, jaws will drop faster than snowflakes in a winter storm! Pair it with a hot cup of cocoa or a chilled glass of bubbly—this cheesecake is ready to impress! Bonus points if you want to show off by slicing it pie-style for a dramatic reveal of those gorgeous vibrant layers.
How to store Christmas Red Velvet Cheesecake
Keep your cheesecake tucked away in the refrigerator, wrapped tightly (like a gift) in plastic wrap or in an airtight container. It’ll chill happily for up to five days—though I doubt it’ll last that long after such a festive feast! Just don’t be surprised if it calls out to you at midnight…
Tips to make Christmas Red Velvet Cheesecake
- Want a deeper red? Use gel food coloring instead of liquid; a little will go a long way!
- Consider using crushed peppermint candies as a garnish for that extra holiday zing. Who doesn’t love a bit of minty freshness?
- Don’t skimp on the chilling time—patience is key to achieving the perfect texture!
Variations
Feeling adventurous? Swap out the colors with different gel food colors for a rainbow cheesecake! Or dive into flavor variations by adding a festive twist of citrus zest or a splash of peppermint extract. The world—or should I say the bakery—is your oyster!
FAQs
1. Can I make this cheesecake ahead of time?
Absolutely! Make it up to two days in advance and let it chill—this will actually help enhance the flavors!
2. How do I know when it’s perfectly set?
A good rule of thumb is to gently shake the pan. If it has a slight jiggle but is mostly firm, you’re golden!
3. Can I freeze leftovers?
Yes, you can freeze slices, though the texture will change slightly—still delicious, just a bit denser. Wrap them well and freeze for up to two months. Just defrost in the fridge before digging in!
There you have it—an epic journey in the form of a festive dessert that’s guaranteed to capture hearts and taste buds alike. So don that chef hat and get ready to spread some holiday cheer with this Christmas Red Velvet Cheesecake! Happy baking! 🍰✨
Christmas Red Velvet Cheesecake
Ingredients
Method
- Start by crushing the Oreo cookies into a delicious dust using a rolling pin or a blender.
- Melt the butter and combine it with the crushed cookies, then press this mixture firmly into the bottom of a springform pan and chill.
- In a mixing bowl, whip together the softened cream cheese and sugar until fluffy, then add in the heavy cream, vanilla extract, cocoa powder, and red food coloring, mixing until smooth.
- Pour the mixture onto the chilled crust, spreading it evenly.
- Allow the cheesecake to chill for at least four hours.
- Before serving, whip up some cream and layer it on top, adding the mini Oreos as garnish.